Logging in
New users can login to their mailbox for the first time with the following steps:
- Go to mail.hostedemail.com
- Use your new email ID
- Use the default password that should have been shared with you by the admin.
Reset password
Once they have logged in, they can reset their password using the following steps:
- Go to settings
- Click on Password
- Type current password
- Type new password
- Retype new password
- Change password
Password recovery
Once they have logged in for the first time and reset their password, Users can also enable the password recovery option. This would ensure that the user always the option of resetting their password in case they ever forget it. This can be done as follows:
- Click on settings
- Go to Password Recovery
- Enter the current password of this email account
- Put in your alternative email address (where recovery code will be sent)
- Put in the verification code to sent to your alternative email address
- Password recovery is enabled
Now whenever the user pits in the wrong password while signing in, they will see an option for password recovery , which when clicked will send the recovery code to the alternative email address. The user will now see an option to input the recovery code and set a new password.
Setting up Email on your phone and other mail clients
1. Android
2. Outlook
3. Mac Mail
4. IOS 12
5. Windows 10
1. Setting up Email on android devices
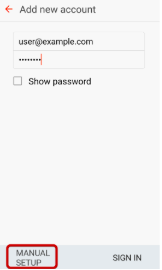
Step 1: Open the Email application
Enter your email address and select Manual Setup
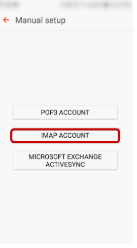
Step 2: Select account type as IMAP
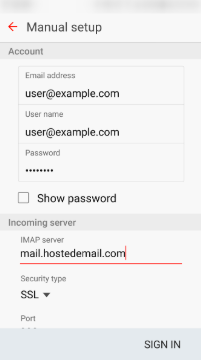
Step 3: Enter Incoming Account Settings
Username Enter your full email address.
Password :The Password field is automatically filled in with the password that you created when you set up your email account.
IMAP server :This is the name of the server which holds your email. Enter mail.hostedemail.com
Port: 993
Security type- SSL
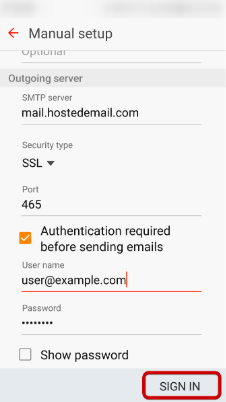
Step 4: Enter Outgoing Server Settings
SMTP Server: mail.hostedemail.com
Port: 465
Security Type: SSL / TLS
Username: Your email address
Password: Your email account password
Click Sign In to complete the setup process.
2. Setting up Email on Outlook
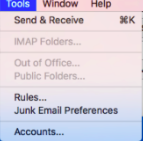
Step 1: Open Account Settings
Launch Outlook, click on Tools, and select Accounts...
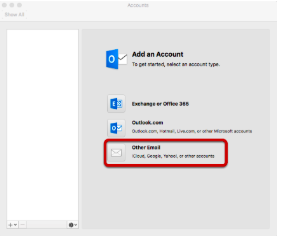
Step 2: Add Mail Account
Select Other Email
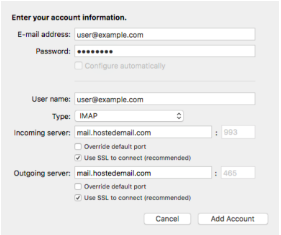
Step 3: Enter Account Information
Enter the following information:
Email Address: Enter your full email address.
Password: Enter the password for your email address.
User name: Enter your full email address.
Type: We recommend IMAP.
Incoming and Outgoing Server: mail.hostedemail.com
Port : Use default ports
SSL: Use SSL to connect
Click Add Account
3. Setting up Email on Mac Mail
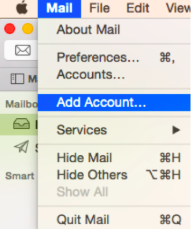
Step 1: Add Account
Launch Mac Mail, click on Mail and then select Add Account.
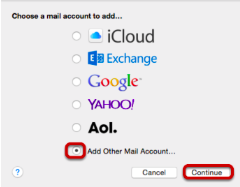
Step 2: Select Account Type
Choose Add Other Mail Account and click Continue
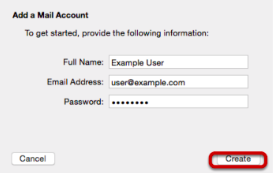
Step 3: Enter Account Information
Enter the following information:
Full Name: This is the name that will appear on all outgoing mail from this account.
Email Address: The full email address of your account.
Password: The password of your email account.
Then click Create.
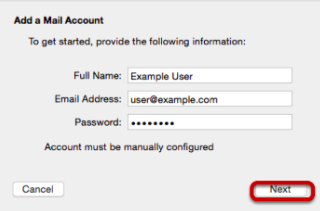
Step 4: Manually Configure Account
The system will prompt you that manual account configuration is required. Click Next.
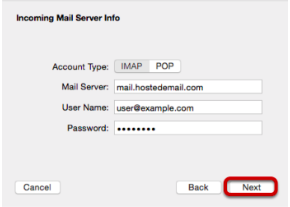
Step 5: Enter Incoming Mail Server Information
Account Type: We recommend IMAP.
Mail Server: mail.hostedemail.com
User Name: Your full email address.
Password:Your email account password.
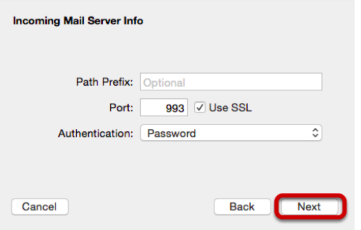
Step 6: Enter Incoming Server Port Information
Enter the following information
Port: 993 (IMAP) or 995 (POP)
Click Next.
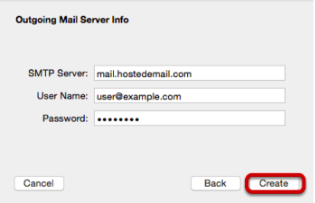
Step 7: Enter Outgoing Mail Server Information
SMTP Server: mail.hostedemail.com
User Name: Your full email address.
Password: Your email account password.
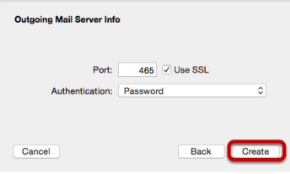
Step 8: Enter Outgoing Mail Server Port
Enter the following information
Port:
465
Click Create.
4. Setting up email for IOS 12
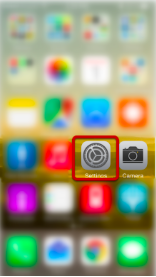
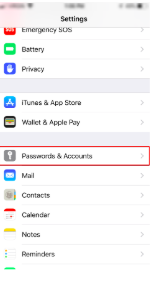
Step 1: Click on Settings on the home screen.
Step 2: Click on Passwords and Accounts
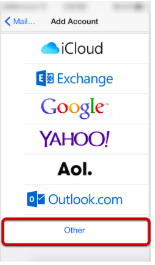
Step 3: Click on Add Account

Step 4: Select "Other"
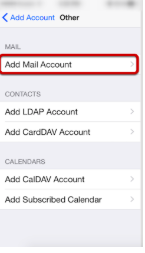
Step 5: Click "Add Mail Account"
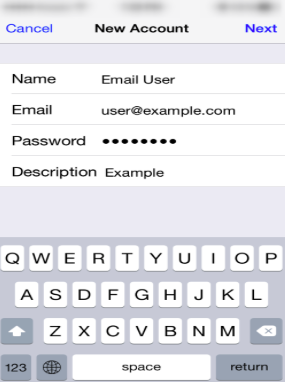
Step 6: Enter Account Information
Enter the following settings:
Name
The name displayed when you send email
Address
Your full email address
Password
Your email account password
Description
Account description of your choice
Tap Next.
Step 7 :Select account type
Select your account type on this page. We recommend IMAP for mobile devices as messages are stored on the server which provides better syncing with multiple devices.

Step 8: Enter Incoming Mail Server Information
Under the Incoming Mail Server section, enter the following settings.
Host Name: mail.hostedemail.com
User Name: Your email account
Password:Your email account password
Scroll down to the Outgoing Mail Server section
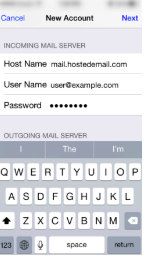
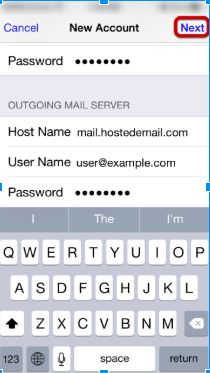
Step 9: Enter Outgoing Mail Server Information
Under the Outgoing Mail Server section, enter the following settings:
Host Name: mail.hostedemail.com
User Name: Your email account
Password: Your email account password
Please note that the outgoing mail server setting is not optional. You will need to enter this information in order to properly configure the account.
Tap Next to complete account setup.
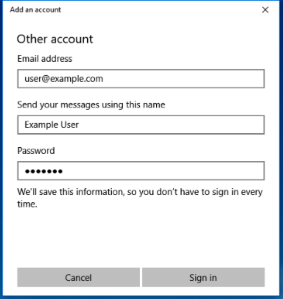
5. Setting up mail in Windows 10
Step 1: Open the Mail application
Click Add Account
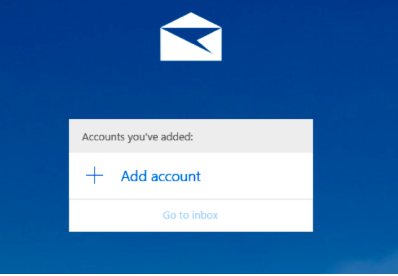
Step 2: Select Account Type
Select Other Account
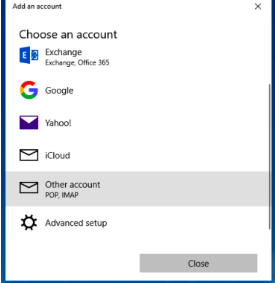
Step 3: Enter Account Details.
Enter your mailbox username, display name, and password. Then click Sign In
Step 4: Enter Advanced Account Information

If Windows is unable to automatically detect the correct connection settings, you may be required to enter advanced account settings. You may enter the above information.
The mailbox is now configured for access in Windows 10 Mail.